Showcase your brand with our versatile retractable banner stands in Miami, offering same-day rush printing and convenient same-day pickup. From tabletop sizes to standard 33×79 inches and up to 8×8 feet for step and repeat displays, our high-quality banner stands are perfect for trade shows, events, and promotional displays. Order by 11 AM and have your banners ready by 5 PM. Our advanced printing technology ensures vibrant colors and sharp images that grab attention and make a lasting impression.
In addition to local services, we provide nationwide shipping and 1-day delivery to most of Florida with UPS Ground. Our efficient and reliable shipping ensures your retractable banner stands arrive on time, no matter where you are. From Miami to Jacksonville, Tampa to Orlando, and beyond, our banners help you stand out at any event. Choose our retractable banner stands for unmatched speed, quality, and convenience. Order today and elevate your presentations with our same-day rush service.
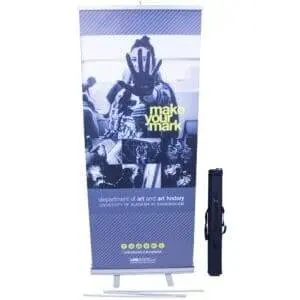
The Appeal of the Economy Retractable Banner Stand
When considering the economy version of a retractable banner stand, several factors highlight its appeal:
- Affordable Design: These stands offer an exceptional blend of style and budget-friendly pricing, making them accessible to businesses of all sizes.
- Durability and Longevity: Despite their cost-effective nature, these stands are crafted to withstand regular use, ensuring that they remain a valuable part of your marketing toolkit over time.
- User-Friendly Setup: Featuring a simple, retractable mechanism, they are easy to assemble and disassemble, perfect for quick setups at trade shows or events.
- Professional Appearance: With a sleek design, these stands provide a polished look that can elevate any display, drawing attention and enhancing brand presence.
Whether you’re a small business owner or part of a larger organization, the economy retractable banner stand offers a compelling combination of aesthetics, robustness, and value for money.
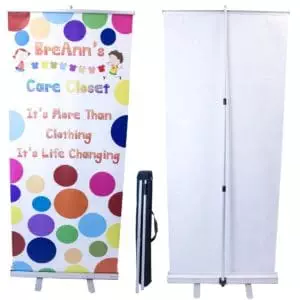
When you purchase a retractable banner stand package, you can typically expect the following components:
- Base with Retractable Mechanism: This serves as the foundation and allows for easy setup and storage. Simply pull up the banner as needed.
- Telescopic Pole: Adjustable in height, the telescopic pole supports the banner and allows for different display settings.
- Top Clamp Bar: This securely holds the top of your banner, ensuring it stays taut and visible.
- Support Pole: Adds additional stability to the display, keeping it upright and stable even in high-traffic areas.
- Travel Bag: A convenient carry case for easy transportation and protection of your banner stand components.
- Banner Material: Typically fabric or vinyl, this is the main display surface. Note that some cartridges accommodate only thinner materials, depending on the design.
These components make it simple to set up and showcase your message effectively, wherever you need it.
Attaching Graphics to a Retractable Banner Stand (note this typically comes already done with our displays)
When it comes to setting up your retractable banner stand, securing the graphics properly is crucial for a polished presentation. Here’s a step-by-step guide to using clamps and tape for a secure fit.
Materials Needed:
- Retractable Banner Stand: Ensure it includes a top bar with a clamping mechanism.
- Double-sided Tape: Opt for a strong adhesive to ensure the graphic stays in place.
- Graphics: Custom-printed on durable, lightweight material for easy handling.
Steps to Attach the Graphic:
- Prepare the Top Bar:
- Open the clamping top bar. Most designs include a hinge mechanism that you can easily unclip to access the graphic slot.
- Apply Double-Sided Tape:
- Cut the double-sided tape to match the width of your graphic.
- Firmly press the tape along the back edge of the graphic, ensuring it’s straight and free of bubbles. This will enhance the grip when clamped.
- Insert Graphic Into the Top Bar:
- Align the taped edge of the graphic with the clamping slot on the top bar.
- Gently press the graphic into the slot while engaging any clips or locking mechanisms to ensure it’s firmly seated.
- Secure and Test:
- Once clamped, pull on the graphic slightly to ensure it’s held securely.
- Adjust if necessary, making sure that the graphic is smooth and taut without wrinkles.
- Final Check:
- Stand back and view the banner from a distance. The graphic should be perfectly centered and hang without slants or curls.
By following these steps, you’ll achieve a professional look that captures attention every time. Whether at trade shows, events, or in-store displays, properly attached graphics enhance the impact of your message.